I decided to take a little break from working... I'm waiting for the Admin Asst to return from lunch so I can go get something to eat... I'm so stinkin hungry... arg... Anywho, in other news, I've decided that tomorrow is going to be the launch day for Apt-203! Yay!
What is Apt-203, you ask?
Apt-203 is my new crafting blog. A few months ago, I was flitting between tumblr and blogger looking for crafty blogs run by ladies of color... only to find maybe 3... that don't post often... *sad face* I was talking to my roommate about it and she gave me that well do it yourself look. You know the one with the raised eyebrow. At first I didn't want to commit to it because I had all these different worries... what if it sucks... what if no one reads it... what if I can't keep up with the consistency... on and on my mind went until I decided that above all my worries, there's surely some other little crafty black girl wondering where are the crafters that look like her. And so, Apt-203 was born.
---hours later---
I'm really excited about starting Apt-203 tomorrow. I was planning to write the welcome post tonight so that it would be all ready to go, but alas, I must go to bed. Wish me luck with my new endeavor! Good night all :)

Showing posts with label craft. Show all posts
Showing posts with label craft. Show all posts
February 28, 2012

February 20, 2012
Crafternoon Project

Today's crafternoon project was this lovely gingham circle skirt! I've had the fabric for... probably a year & the yellow bias tape used in the waistband for longer. o.O
I used the pattern found here and it was really simple to follow. The only snafu I ran into was running out of fabric, but in the spirit of Tim Gunn, I made it work by sewing scrap pieces together to fill out the needed space. I also covered a little button with the same fabric & put it above the zipper. The bottom still has to be hemmed, but other than that, it's all done. ^.^
February 4, 2012
Shoe Refashion: Mod Podge + Fabric
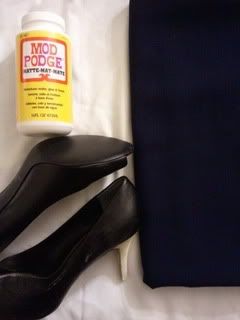 |
| Ingredients for tonight's project. Mod Podge, fabric, shoes chewed up by a bad little dog. (not pictured: scissors, straight razor, hot glue, & sand paper) |
After watching a video by Corinne on Youtube, I decided that if she can mod podge a doily onto her shoes- I should be able to mod podge fabric onto mine. I did a little more youtube research & found one video of a girl covering a shoe with fabric. So I picked up some more podge from walmart, grabbed some fabric from my stash, & got to work.
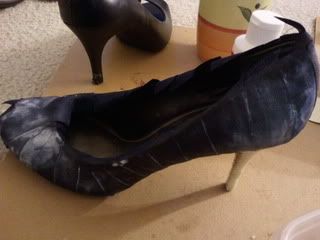 |
| Here is the first shoe with podge drying. |
At first, I was going to cover the shoe with a solid piece of fabric, but that turned out to be a bit harder than I expected... So I cut the fabric into strips & overlapped them all around the shoe.
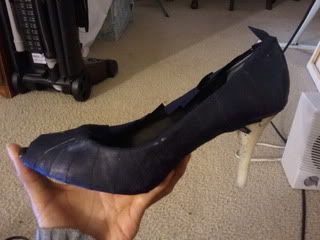 |
| Podge mostly dry, waiting for the heel wrapping to begin. |
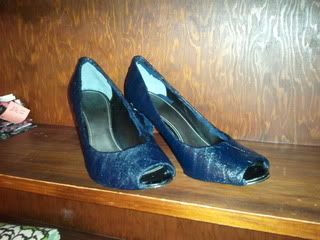 |
| The finished shoes! |
I have to replace the heel ends because they were chewed off & spray a layer of water-proofer on them. When I started this project, I was thinking I'd wear them to church tomorrow, but that's totally not happening... Better luck next week. They came out really nicely though. Of course, pictures of them on to come ^.^
I'm quite proud of them. :)
February 2, 2012
January 31, 2012
Light Box
I finished my light box last night. ^.^ Yay me!
Anywho, it turned out really nicely. I picked up a piece of white & a piece of grey poster board for the backgrounds. This way I have a choice on what background I would like in my photos. I was actually tempted to buy a random bright color like pink or orange... but I decided to keep it rather tame for this first attempt. I can tell that it is going to be really nice for our product photos for the Pins&Needles shop. The box I used was about 2'x1.5' roughly... so I'm seriously considering making a bigger one. But for the time being, this first one will be fine. Here's an example of a photo taken in the light box:
I think the lighting came out really good- not too bright. I will definitely be using this light box a lot. And it was very inexpensive: the box was free; the tape & hot glue were already in the house; and all I had to buy were 2 poster boards & a wooden dowel. Those small purchases cost me about $3.65. Not bad to get a professional looking photo result. Dusts off shoulders!
Anywho, it turned out really nicely. I picked up a piece of white & a piece of grey poster board for the backgrounds. This way I have a choice on what background I would like in my photos. I was actually tempted to buy a random bright color like pink or orange... but I decided to keep it rather tame for this first attempt. I can tell that it is going to be really nice for our product photos for the Pins&Needles shop. The box I used was about 2'x1.5' roughly... so I'm seriously considering making a bigger one. But for the time being, this first one will be fine. Here's an example of a photo taken in the light box:
  |
| Family Strip Hat |
January 29, 2012
Crafternoon
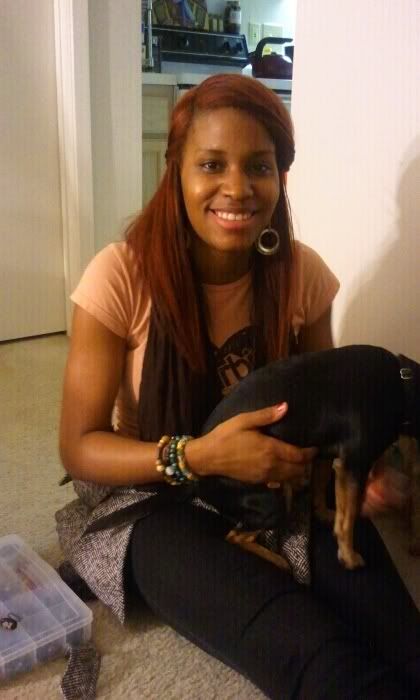
The lovely Ms. D, came over for crafternoon & she made a bunch of cute bracelets & rings. =) She did a great job stash-busting my beads.

(close-up of her bracelets)
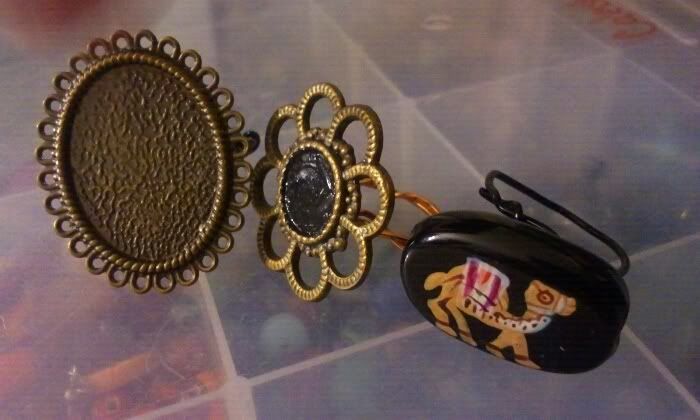
(close-up of her rings... she said she's going to find a small photo inside the framelike ring on the left. cool huh)
I didn't finish anything, but I started making my photo lightbox for the Pins&Needles product photos. I just have to pick up the lights & a poster board to use as the seamless white background. I found a really good tutorial here. Anywho, D was really excited to come over & make things. She said next time, she's going to bring more people (YAY!) The more the merrier!
Subscribe to:
Posts (Atom)